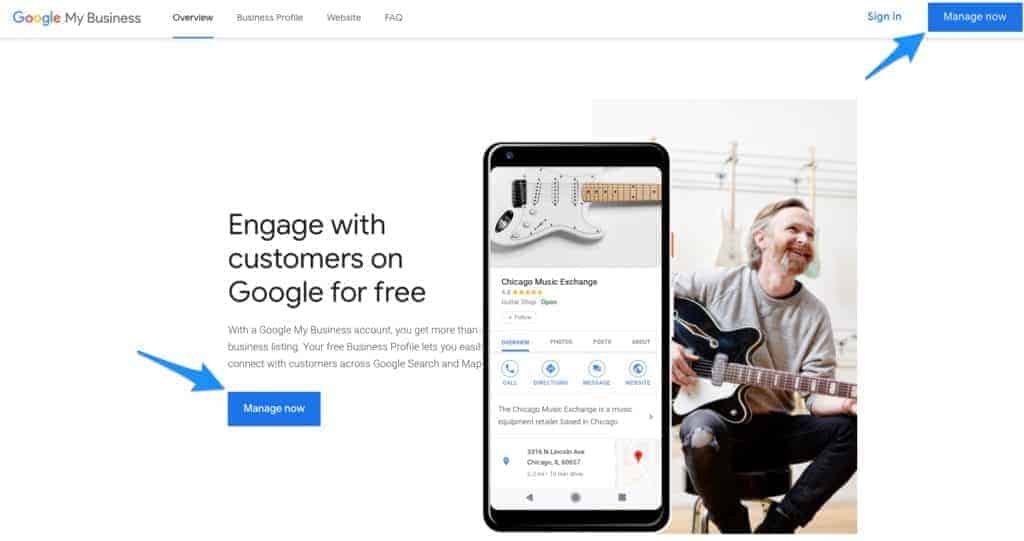
Creating a Google My Business Account (GMB) is a relatively simple process. Before you begin this process I would strongly advise you to log in to your Google Account (G-Suite or Gmail) beforehand.
Pro Tip: If you have a branded G-Suite Account, use this one instead of basic Gmail. As an example a branded account is a domain url account like peter@yakadanda.com instead of peteretce@gmail.com
Creating Your Account
Before you can set up your GMB profile, you’ll need to make sure you have a G-Suite business account or log into your existing Google account.
When you go to Google My Business homepage, simply click “click manage now” and follow the simple steps!

Enter Your Business Name
Then Google will ask you to enter your business name, be as accurate as possible as they will do a search to see if there is an existing listing under that name that you can take control of.
To find out if a business listing already exists for your company, type one of the following combinations into Google:
- Your business name + city
- Your business address
- Your business telephone phone number
Enter Your Address / Delivery Information
The system will ask for your location, enter this information. You will also be asked a couple of questions about this location.
These questions determine whether you are a physical address people visit, or a virtual address (where you visit customers).
Pro Tip: If you work from home or an office where users cannot visit you in person, tick hide address and optionally I deliver goods and services to my customers
Also, Google will also ask you about your delivery area. You are limited to miles/km from your location which seems to change from time to time.
Enter Business Information
Complete as much information as you can, phone numbers, business categories (don’t add inaccurate data – ever)
You will be prompted to add all the basics and we will go into more detail for each section in subsequent posts.
Pro Tip: Be sure to be as accurate as you can possibly be. Your competition or people browsing and engaging may flag your content if it is not correct and that could mean a few months in purgatory.
Claim and Verify your Listing
Once you have created everything it is time to verify. Now Google gives a few options – and these depend greatly on what data it has stored about your business.
I actually have no idea how this is done, but you will have these options
- Verify by Postcard – You will be sent as a postcard to your business address (even if hidden) to verify your location.
- Verify by Email – You will be sent as an email to your business email address (doesn’t seem to be available for basic Gmail Accounts) to verify your business.
- Verify by Phone – You will be called to verify your business from the phone number supplied (usually if your data checks out using their verification systems)
When you receive the code or verification, log into your account and enter the code to verify. That’s it! In a few days (usually 2 or 3) your listing will be only.
Next in the series, we will talk about optimizing your listing and getting as much accurate data into the listing as possible.


